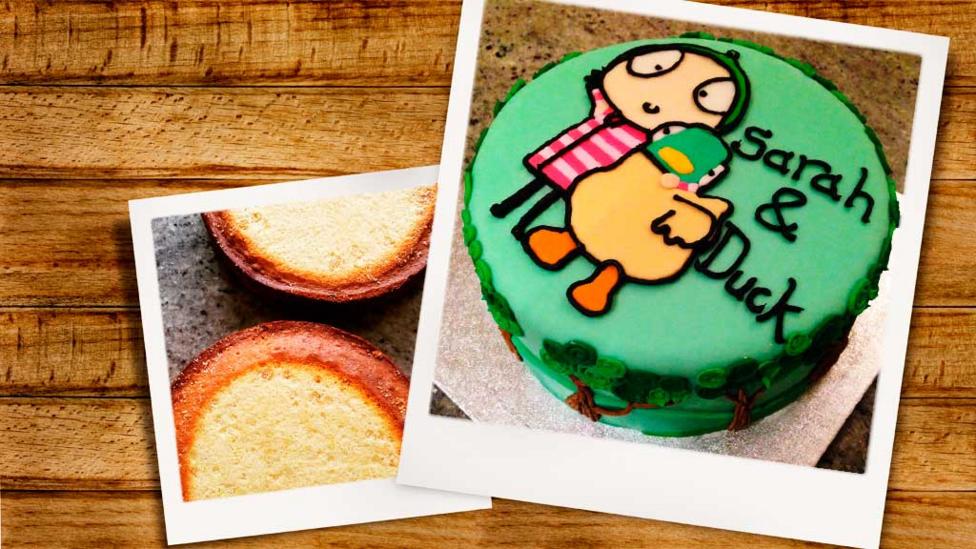
Sarah & Duck Cake
CBeebies-themed birthday cake by Great British Bake Off finalist, Richard Burr.

Warning: it is physically impossible to make this cake without quacking like Duck throughout...
Ingredients
For the sponges
8 large eggs
450g caster sugar
450g unsalted butter, room temperature (plus extra for greasing)
450g plain flour
5 tsp baking powder
For the filling
250g unsalted butter, room temperature
500g icing sugar
½ tsp vanilla paste
200g strawberry jam (no bits)
For the topping
1.5kg fondant icing
1 large egg white (or if you’re nervous about using egg you can buy pre-made royal icing in most supermarkets)
400g icing sugar
A few splashes of lemon juice
Food colouring gels
Kit needed
23cm springform cake tin
Baking parchment
Square cake board, mine was 30cm2
Electric hand whisk or electric stand mixer
Small offset palette knife
Small piping bags
2mm piping nozzle
Rolling pin
Cooling rack
Cake cutting wire (optional but very useful)
Cake smoother (optional but very useful)

Method
Sponges
This cake is made from two large sponges cut into two layers each, so there are four layers inside the cake. Make the sponge cakes one at a time with 4 large eggs, 225g unsalted butter, 225g caster sugar, 225g plain flour and 2½ tsp baking powder in each cake. You might want to make the sponges in advance, in which case wrap them well in cling film to prevent them drying out.
Preheat the oven to 180 degrees C / 160 degrees C fan / gas mark 4. Take your springform cake tin, line with baking parchment and grease well.
Put the butter and sugar into a bowl and beat with an electric hand whisk or in a stand mixer until light and creamy. Thoroughly beat in each egg, one by one. If the mixture starts to split, add 1 tbsp of the flour to bring it back.
Sift in the rest of the flour and baking powder and fold them in. Be gentle but make sure the mixture is fully combined, including any flour at the bottom of the bowl. Put this into the cake tin, smooth the batter out with an offset palette knife and bake for 45-50 minutes.
Check that the cake is cooked by poking a cocktail stick into the centre: if it comes out clean then it’s cooked; if it’s got cake mix on it, give the cake another few minutes before testing again. Take out of the oven and set on a wire rack. Once cool enough to touch, pop the cake out of the tin and return the sponge to the rack to fully cool. Repeat.
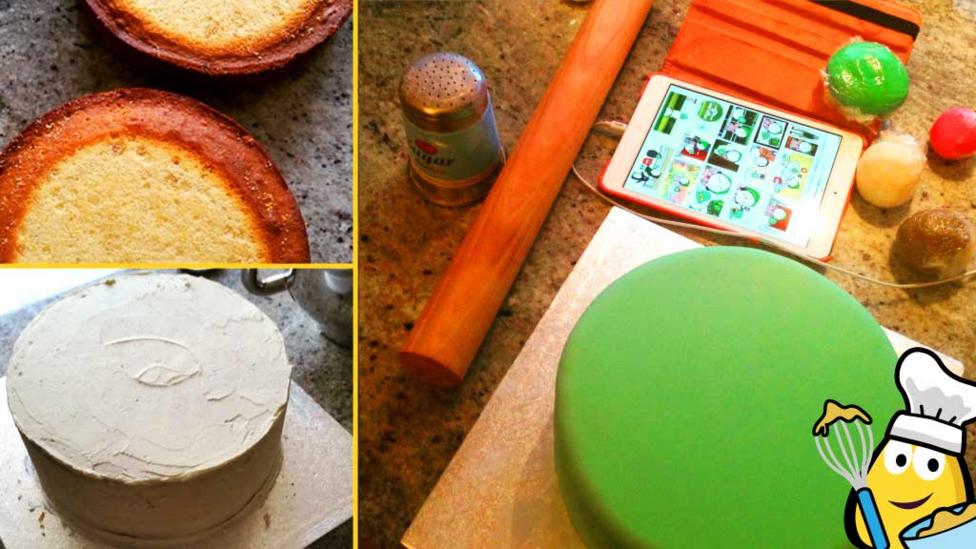
When the cakes have cooled, use your cake cutting wire (or a sharp bread knife if you don’t have a cutting wire) to level the tops of the sponges and to cut them through the middle to turn your two large sponges into four thinner layers.
Filling
To make the buttercream, beat the butter in a large bowl with an electric hand whisk or in a stand mixer. Pour in the icing sugar, add the vanilla paste and mix slowly on the lowest setting on your mixer until completely incorporated.
Take the first layer of cake and put onto your cake board. Spread a thin layer of buttercream onto the bottom cake and smooth with an offset spatula. Add a thin layer of jam (around 2tsps smoothed out) on top of the buttercream. Spread a thin layer of buttercream onto the bottom of the next cake layer and lay the next sponge on top of the cake.
Repeat until it is a four layer sponge cake (sponge, buttercream, jam, buttercream, sponge, etc.). Coat the entire cake in a thin layer of buttercream and smooth with an offset palette knife.
Topping
Using a small amount of green gel food colouring, colour 1kg of fondant to cover the cake. Roll this out to a circle of about 40cm diameter and use your rolling pin to carefully lift this onto the cake. Use a cake smoother (or your hands) to smooth the fondant onto and all around the cake. Cut the excess fondant from the base of the cake with a sharp knife.
Colour small amounts of fondant icing with all the colours you will need and wrap each ball in cling film to prevent it from hardening or drying out.
This is a really good template for any sort of character cake. Once you have an iced base, you can decorate with any kind of design you like – just do a Google image search for your favourite characters.
For this cake, I used different shades of green fondant to make the hills around the bottom sides of the cake. Press them onto the cake with tiny dabs of water on the back of them to help them stick.
Make up the royal icing for the trees and to edge Sarah & Duck by mixing around 400g icing sugar with one large egg white (or two chicks). If the royal icing needs loosening, add a splash of lemon juice.
Divide the royal icing into four small bowls and colour in black, brown and to shades of green. Load a small piping bag fitted with a 2mm nozzle with the brown royal icing and pipe the tree trunks around the sides of the cake. Repeat with each shade of green to add the leaves to the trees.
Cut Sarah & Duck out of pieces of fondant and arrange on the top of the cake. I hand-drew a design and cut each of the pieces out to use as a template. This is quite fiddly but it’s a lot of fun.
Load the black royal icing into a small piping bag fitted with a 2mm nozzle and pipe around the Sarah & Duck characters to finish.
Give someone a very Happy Birthday!
Read Richard's blog, which is filled with useful cake baking tips and tricks.
If you're looking for some further inspiration for a little one's birthday or party, why not check out our CBeebies-themed cake board on Pinterest.
Get the rest of Richard's CBeebies cake recipes.